
How to Refinish Antique Timber Furniture Without Erasing Its Character
The first question I ask with older furniture is not, “How should I refinish this?”
It is, “Does it actually need to be refinished?”
That distinction matters.
A piece can look tired, scratched or dull and still have an original surface worth keeping. Once that surface has been stripped away or sanded through, there is no simple way to put sixty or eighty years of history back.
I have seen furniture brought into the workshop after someone started with the best intentions and went too far. Veneer has been sanded through. Edges have lost their shape. Original colour has disappeared. Heavy modern coatings have been added because the timber looked uneven after preparation.
By that stage, the job is no longer simply about refinishing.
It becomes a repair.
With antique and older timber furniture, I prefer to start slowly and disturb as little as possible until I understand exactly what I am looking at.
Sometimes the Safest Refinishing Is Very Little Refinishing

Not every mark needs to disappear.
That is probably the most important thing to understand before working on older furniture.
A scratch, small dent, faded area or change in colour may be part of the furniture’s age rather than a problem that needs to be completely erased.
There is also a difference between damage and patina.
Damage may be unstable veneer, a failed coating, water staining, broken joints or a surface that is no longer protecting the timber.
Patina is different.
It can include gentle wear, colour variation and the signs of normal use that have accumulated over many years.
I do not automatically remove those things.
The aim is to make the furniture sound, usable and visually balanced without turning an old piece into something that looks as though it was made last week.
That preservation-first approach is something I discuss further in my article on restoring mid-century furniture with restraint rather than reinvention.
Before Sanding, Work Out How the Furniture Was Made
Older furniture can be deceptive.
A surface may look like solid timber when it is actually a thin decorative veneer over another material.
A dark area may look like a stain when it is part of an older finish.
An edge that appears slightly uneven may have been shaped deliberately rather than damaged.
Before I remove anything, I want to understand the construction.
I look at the edges, underside, drawer interiors, joints and areas where the finish has naturally worn.
That helps me work out the timber, whether veneer is present, what the existing coating may be and whether somebody has already refinished the piece.
Previous work can change everything.
If a piece has already been heavily sanded once, there may be much less veneer remaining than expected.
If somebody has applied polyurethane or another modern coating over an older finish, the surface may behave very differently from one that has remained largely original.
That is why inspection comes before tools.
Veneer Is One of the Biggest Reasons to Slow Down
Some of the most attractive older furniture uses veneer.
That is not a sign of poor quality.
Fine veneer allowed furniture makers to use beautifully figured timber economically and consistently, and it appears on many well-made vintage and mid-century pieces.
The problem comes when someone treats veneer like a thick slab of solid timber.
It may only be a thin surface layer.
Once you sand through it, you expose the substrate underneath. At that point, more sanding will not fix the problem.
This is why I am very cautious around edges, corners and areas that have already been repaired.
If the veneer is bubbling, lifting, chipped or missing, it should usually be stabilised before the surrounding surface is refinished.
My guide to teak veneer repair goes into that problem in more detail.
Clean It Before You Decide It Needs Stripping
Old furniture collects more than dust.
Wax, polish, smoke residue, grease, household cleaners and decades of handling can all change the appearance of a surface.
That can make a finish look much worse than it actually is.
I prefer to clean a piece carefully before deciding whether more invasive work is necessary.
Once the surface is clean, I can see what is dirt, what is genuine finish deterioration and what is damage to the timber itself.
Sometimes the improvement is substantial.
A piece that initially looked as though it needed complete refinishing may only need further cleaning, small repairs and some careful work on the existing finish.
That is a much better outcome than stripping something unnecessarily.
Be Careful With Chemical Strippers
Chemical stripping has a place in furniture restoration.
There are old coatings that are simply not practical to remove by sanding, particularly when the surface has several layers or includes mouldings and shaped details.
But “chemical stripper” is not one single process.
Different products react differently with old coatings, adhesives, veneer and timber.
I would not use a strong stripper simply because it removes finish quickly.
Speed is not the priority.
Control is.
The product should first be tested somewhere inconspicuous, and you need to understand how the surface will be cleaned afterwards before any new finish is applied.
Residue left behind can create problems later with staining or adhesion.
Chemical stripping can sometimes reduce the amount of sanding required, which is useful, but it still needs to be approached as carefully as any other irreversible step.
Sanding Is Where Irreversible Damage Happens Quickly
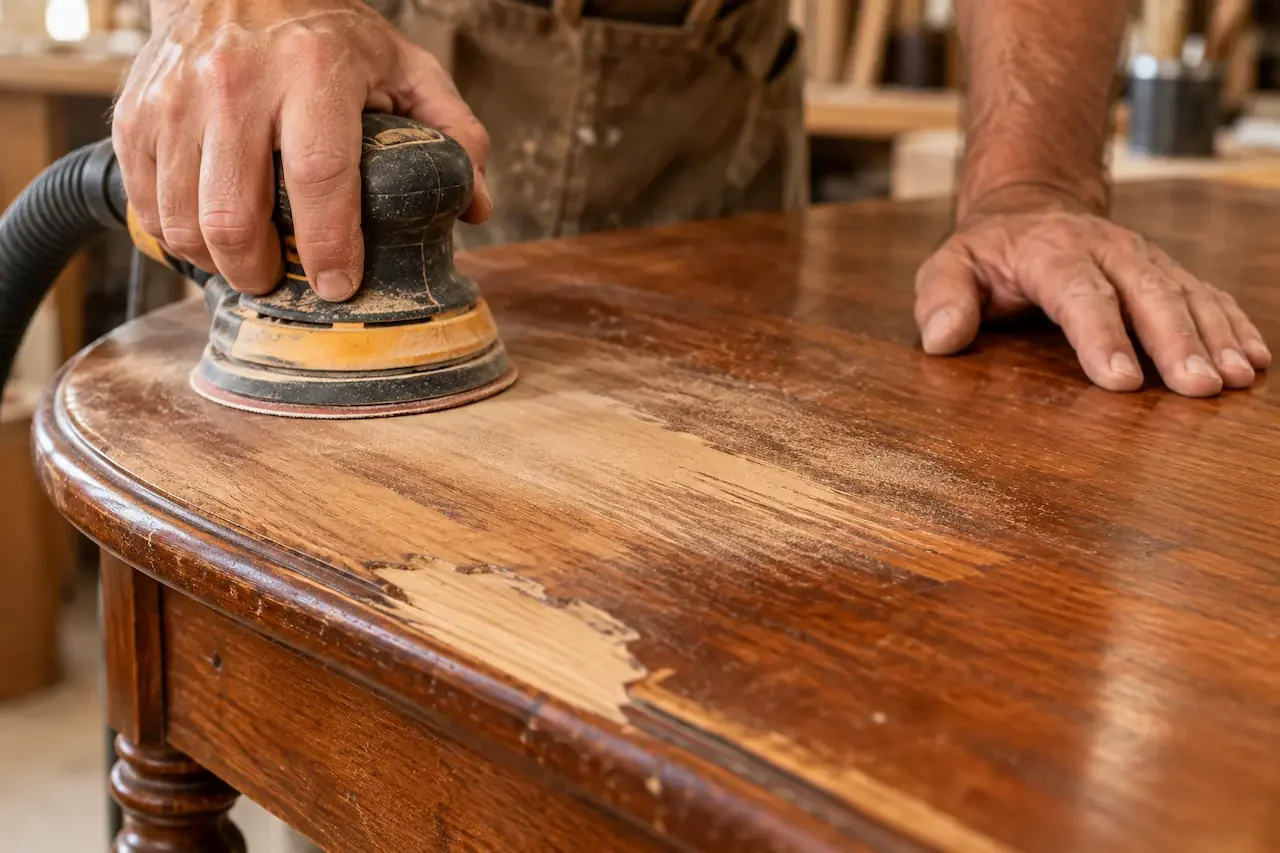
A power sander can remove a lot of material in a very short time.
That is useful when working on the right surface.
It is dangerous when working on the wrong one.
I see sanding as preparation, not as a way to make every mark disappear.
If a scratch is deep enough that removing it would require taking away a significant amount of original timber, I would question whether that scratch actually needs to vanish completely.
The same applies to edges.
Old furniture often has subtle hand-shaped profiles and softened corners. Heavy sanding can change those details before you realise how much material has gone.
Where I need more control, I would rather work slowly by hand.
You can always remove a little more timber.
You cannot put it back.
Don’t Assume Every Old Piece Needs Stain
Another common reaction is to sand an old piece, see uneven colour and immediately reach for a dark stain.
That can create another problem.
Older timber naturally changes colour over time. Different parts of the same piece may have received different amounts of sunlight. Repairs may also contain slightly different timber.
Not every variation needs to be hidden.
Stain is useful when there is a specific colour problem to solve, but I do not see it as an automatic stage of refinishing.
Used too heavily, it can flatten the grain and make an interesting old piece look strangely uniform.
I prefer to preserve natural variation where it still looks appropriate to the furniture.
The Original Finish Matters More Than Most People Think
Before choosing a new finish, I want to know what was originally there and how much of it survives.
That does not mean every original coating must be preserved regardless of condition.
Some have failed completely.
But understanding what the maker used can guide the restoration and help avoid finishes that look wrong on the piece.
Oil is not automatically safest because it sounds natural.
Lacquer is not automatically too modern.
Shellac is not automatically correct because the furniture is old.
The decision depends on the timber, the existing surface, how the furniture will be used and what you are trying to preserve.
I have covered those decisions separately in my guide to choosing the best finish for mid-century furniture.
The important point here is that the finish should follow the assessment, not dictate it.
Repair Structural Problems Before Refinishing
An attractive surface does not make a loose piece of furniture sound.
If joints are moving, veneer is lifting, timber is cracked or an old repair has failed, I want to address that before spending time on the finish.
Movement can also affect the refinished surface later.
A table or cabinet that continues flexing can eventually develop cracking or separation around joints even after the top looks beautiful.
Structural work and refinishing are connected, but they are not the same thing.
My furniture repair and structural restoration service explains more about the repair side when a piece needs more than cosmetic attention.
Common Mistakes That Can Permanently Change an Antique Piece
Most damage does not come from someone intentionally mistreating furniture.
It usually comes from trying too hard to improve it.
The mistakes I am most cautious about are:
sanding until every scratch or colour variation disappears
assuming veneered furniture can be treated like solid timber
stripping an original finish before deciding whether it can be saved
using strong chemicals without first testing the surface
staining the whole piece dark to hide uneven preparation
applying a thick modern coating simply because it is durable
refinishing before loose joints, cracks or veneer problems are repaired
There is a pattern behind nearly all of these.
Too much work is done before enough is understood about the furniture.
With older pieces, restraint is often a skill in itself.
What About the Wood Grain?
People often worry about damaging the wood grain.
Usually the bigger issue is not the grain itself disappearing. It is the surface being altered so aggressively that the natural appearance of the timber is lost.
Over-sanding can flatten texture, soften edges and remove aged colour.
Heavy stains can hide natural variation.
Thick coatings can make the surface look separate from the timber underneath.
Good restoration lets you continue seeing the wood.
The grain should still feel like part of the furniture rather than something trapped underneath a heavy layer of finish.
How I Approach an Older Piece in the Workshop
I do not follow exactly the same sequence with every item.
The furniture decides the process.
I first work out how it was built and what is original.
Then I look at what has failed.
If the piece mainly needs cleaning and a few small repairs, I do not turn it into a full refinishing project.
If the coating has genuinely failed, I work out how much needs to be removed and which method gives me the most control.
If there are structural or veneer problems, those are dealt with before the final surface work.
Only after that do I think about colour and protective finish.
That approach may take longer at the beginning, but it usually prevents unnecessary work later.
When I Would Not Refinish the Furniture Myself
There are plenty of old pieces that make perfectly reasonable DIY projects.
There are others I would be careful with.
If the furniture is valuable, rare, has a maker’s mark, contains delicate veneer, still has a substantial amount of original finish or has already undergone several previous restorations, I would assess it properly before stripping anything.
The same applies to furniture with strong sentimental value.
If you would be genuinely upset if the result went wrong, that is a good reason to understand the surface before experimenting on it.
For a straightforward refinishing project, my broader guide to how to refinish wood furniture explains the process of cleaning, stripping, sanding, repairing and finishing in more detail.
This article is deliberately more cautious because older and antique furniture does not always benefit from the standard “strip, sand and refinish” approach.
When Professional Assessment Makes Sense
I would consider having a piece assessed before working on it if there is damaged veneer, structural movement, deep water staining, an unusual finish or uncertainty about how much of the existing surface is original.
That does not automatically mean the furniture needs complete restoration.
Sometimes the most useful part of an assessment is finding out what not to do.
If the surface genuinely needs more extensive work, you can see how I approach teak and timber furniture refinishing.
Frequently Asked Questions
What is the safest way to refinish antique timber furniture?
Start with inspection and gentle cleaning before sanding or stripping. Work out whether the furniture is solid timber or veneer, assess the existing finish and only remove material when there is a clear reason to do so.
Can sanding reduce the value of antique furniture?
It can if original surfaces, veneer, edges or other important details are removed. Whether refinishing affects value depends on the individual piece, which is why unusual or potentially valuable furniture should be assessed before aggressive sanding begins.
Should I remove the patina from old furniture?
Not automatically. Patina can be part of the character of an older piece. I distinguish between deterioration that needs attention and normal ageing that can be left alone.
Are chemical strippers safe for antique furniture?
They can be useful, but the product and surface need to be understood first. I would test any stripper in a discreet area and make sure residues are properly dealt with before refinishing.
Is hand sanding safer than using a power sander?
Hand sanding often gives better control, especially around veneer, edges and shaped details. A power sander is not inherently wrong, but it can remove material very quickly if used aggressively.
Should antique timber furniture be oiled?
Not simply because it is old timber. The correct finish depends on the original coating, timber species, condition and how the furniture will be used.
Can damaged veneer still be refinished?
Often, yes, but the veneer should usually be stabilised or repaired before the surrounding surface is refinished. Sanding loose or damaged veneer can make the problem considerably worse.
The Safest Approach Is Usually the One That Removes the Least
The biggest lesson I have learned from old furniture is that more work does not automatically mean a better restoration.
Sometimes the right decision is to strip a failed finish and rebuild the surface.
Sometimes it is to repair a damaged section and leave everything else alone.
And sometimes the best thing you can do is clean the furniture, stabilise what needs attention and keep the original finish exactly where it is.
I would rather preserve something genuine than remove it simply to make the surface look newer.
If you have an older or antique piece and you are unsure whether it should be stripped, sanded or refinished at all, take a few clear photographs before touching it. You can contact me at Mid Century Restoration, and I can tell you what I would want to examine before any irreversible work begins.