
Teak Veneer Repair: Can It Be Saved, or Does It Need Replacing?
Bubbling, lifting, chipped corners, water rings if you've just spotted damage on a teak sideboard, dining table or credenza, your first question is probably the same one I hear every week in my Fitzroy workshop: is this veneer repairable, or is the piece ruined?
The honest answer is: it depends. Teak veneer damage looks more alarming than it usually is, and in most cases there's more of the original timber left to save than people expect. But veneer is also unforgiving of the wrong fix: a rushed sanding job or the wrong glue can turn a five-minute problem into a full re-veneering job.
I'm Richard Lloyd, and I've spent over 30 years restoring mid-century teak furniture in Melbourne. In this guide, I'll walk through exactly when teak veneer repair works, when replacement is the safer call, what furniture forums and online communities get right (and wrong) about DIY fixes, and how to find a restorer who won't make the damage worse.
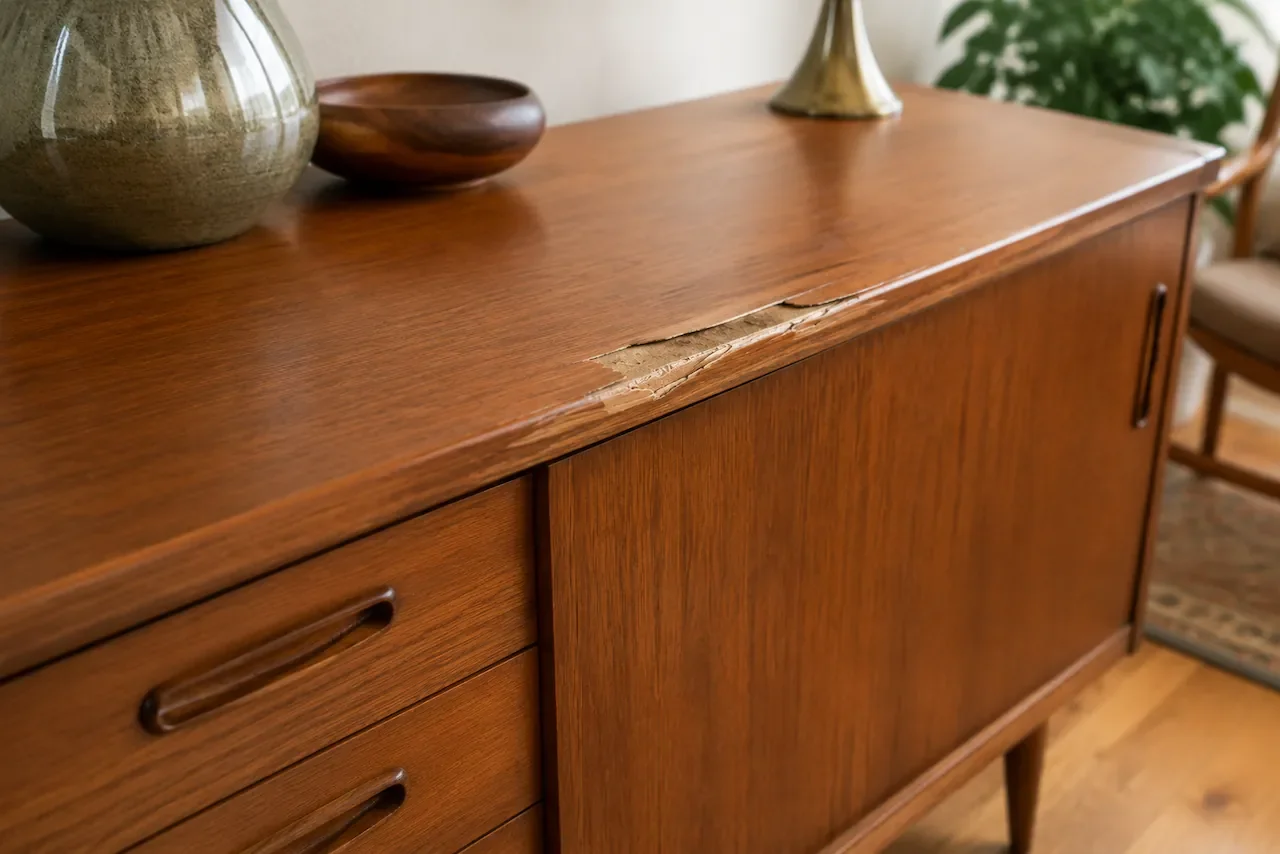
What Teak Veneer Actually Is (and Why It Isn't "Cheap")
Teak veneer is a thin sheet of genuine teak timber bonded to a stable base, usually plywood or a similar engineered core. Mid-century manufacturers used it deliberately, not as a shortcut. Veneering let makers showcase dramatic grain patterns across wide surfaces like sideboard doors and table tops while keeping the furniture lighter, flatter and less likely to warp than a slab of solid teak would be.
That's worth repeating, because it's the single biggest misconception I run into: veneer does not mean low quality. Some of the most sought-after Danish and Australian mid-century pieces Parker, Fler, G Plan, Tessa rely on veneer for their finish.
What veneer does mean is that the timber layer is thin, typically well under a millimetre on genuine mid-century pieces. That thinness is exactly why aggressive sanding, stripping, or a heavy-handed repair can cut straight through it and expose the base material underneath.
If you're not sure whether a piece is solid timber or veneered, it's worth reading our guide on how to restore teak furniture without damaging the original finish before you touch it with sandpaper, water, or oil.
Common Types of Teak Veneer Damage
Veneer damage tends to fall into a handful of categories, and each one needs a different fix:
Lifting edges — the veneer has come away from the substrate at a seam or corner
Bubbling or blistering — a raised, hollow-sounding patch where the glue bond has failed
Surface cracks or splits along the grain
Chipped corners on doors, drawer fronts, or table edges
Missing sections, often where a previous repair has failed
Water stains and heat marks where moisture or a hot dish has sat on the surface
Sand-through damage — pale patches where the teak layer has been sanded away to reveal the base timber
Poor past patching, such as mismatched filler or the wrong-coloured veneer
A small lifted edge is a very different job to a missing section the size of a coaster, so the first step in any assessment is identifying exactly which of these you're dealing with — not reaching for the sander.
When Teak Veneer Can Usually Be Saved
In my experience, veneer is repairable more often than people assume, provided the surface layer is still largely intact. You're generally in good shape if:
The veneer is lifting but hasn't cracked or broken apart
Bubbling is confined to a small area
Chips are minor with clean edges
The surface hasn't already been heavily sanded
Water hasn't softened or swollen the base material underneath
The original grain and colour are still visible
The piece is otherwise structurally sound
This lines up with what furniture forums like WoodWeb and Quora repeatedly confirm: lifted or bubbled veneer can often be reactivated and re-bonded with the right adhesive and even clamping pressure, rather than replaced outright. Preserving as much of the original veneer as possible matters for mid-century furniture specifically, because the grain, colour, and patina are part of what gives the piece its character and value — over-restoring it can actually make a genuine vintage piece look artificially new. For pieces with real collector value, our article on whether mid-century furniture can be restored without losing value is worth reading before you commit to any repair.
When Teak Veneer May Not Be Saved
Some damage genuinely is beyond a simple repair. Veneer usually can't be safely saved when:
Large sections are missing
The veneer has already been sanded through to the base layer
The substrate is swollen, soft, or crumbling from water damage
The veneer has become brittle and is breaking into fragments
Old glue, filler, or a failed previous repair has contaminated the surface
Heat damage has caused deep delamination
This matches guidance from furniture-care resources like NC State Extension, which notes that veneer over a particleboard or fibreboard core is particularly vulnerable once water gets into the seams, because the core itself swells and the bond fails from underneath — no amount of re-gluing the surface will fix that.
Even here, though, full replacement is rarely the first move. The better approach — and the one I use — is targeted patching: replacing only the damaged section with matched veneer, rather than stripping and re-veneering an entire top. It's more work upfront, but it protects far more of the original material and keeps the furniture looking like itself.
What Reddit and Quora Threads Get Right About Veneer Repair (and Where They Fall Short)
If you've searched "can veneer be repaired" online, you've probably landed on a Quora or Reddit thread with dozens of conflicting answers. A few patterns come up consistently, and most of them hold true:
"It's thin, so treat it gently." This is the most repeated (and most accurate) advice across woodworking forums — veneer reacts fast to heat, moisture, and abrasive sanding, and the margin for error is small.
"An iron can reactivate old contact adhesive." Cabinetmaking forums often suggest gently heating a bubbled area through a cloth to soften the original glue and press it flat. This can work on simple contact-cement bonds, but on genuine mid-century teak — where the finish, adhesive, and veneer thickness vary piece to piece — the wrong heat or pressure can just as easily crack the timber or discolour the surrounding finish.
"Match the grain or don't bother." Community consensus is unanimous here: a patch that doesn't follow the grain direction and colour of the surrounding veneer will always be visible, no matter how well it's glued and sanded.
Where DIY advice threads tend to fall short is scale and risk tolerance. What reads as a quick weekend fix on a generic flat-pack veneer piece is a much higher-stakes decision on an original 1960s teak sideboard, where the veneer can't simply be bought off the shelf to match, and a failed attempt often costs more to fix than the original damage would have.
Why DIY Veneer Repair Can Go Wrong
DIY veneer repair looks straightforward from a video or forum post, and sometimes it is. But the risk is genuinely higher than with solid timber, because veneer is so thin and reacts quickly to moisture, heat, and pressure. The mistakes I see most often include:
Using too much glue, which squeezes out and stains the surrounding grain
Choosing the wrong adhesive for the substrate
Clamping unevenly, which can crack or distort the veneer
Sanding straight through a thin patch
Using filler that doesn't match teak's colour or grain
Cutting a patch against, rather than with, the grain direction
Applying oil or finish before the repair has fully cured
Trying to flatten a bubble too aggressively and splitting it instead
The most common one, by far, is sanding a damaged area in the hope the mark will simply disappear. On solid timber that can work. On veneer, it's usually how a small blemish turns into an exposed substrate and a much bigger repair. If your piece just looks dull or faded rather than physically damaged, it's worth understanding how to refinish teak furniture safely before deciding sanding is even necessary.
How Professionals Repair Teak Veneer
A proper repair starts with assessment, not adhesive. Before anything is glued, filled, or finished, we need to understand the veneer's thickness, the type and depth of damage, the condition of the substrate underneath, and how the existing finish will react to any repair.
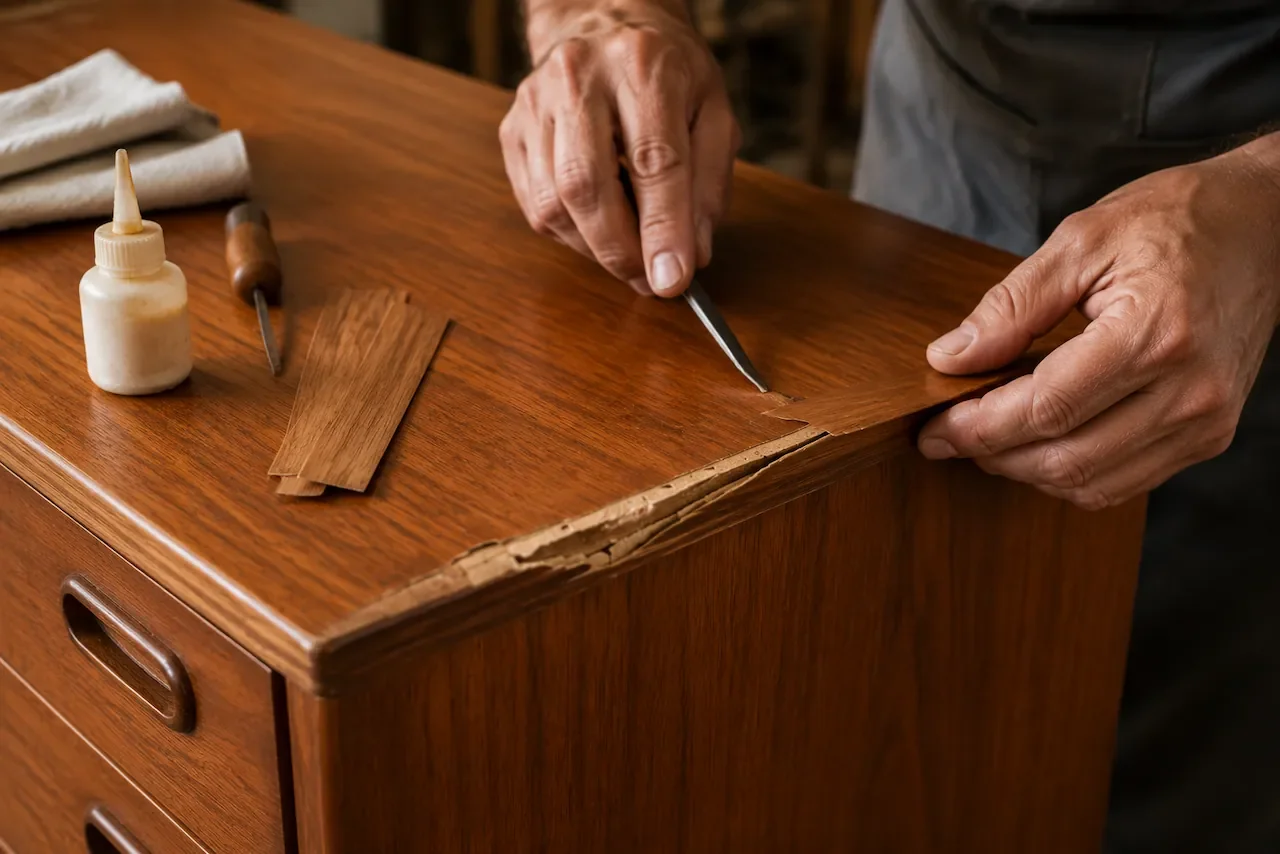
From there, the process typically involves:
Inspecting the damage closely and testing whether the veneer is still flexible
Cleaning old residue, glue, or contamination without over-wetting the surface
Re-bonding lifted sections with a suitable adhesive
Clamping evenly while the glue cures
Cutting and fitting a matched veneer patch where a section is missing
Aligning grain direction and colour before bonding
Levelling the repair carefully, without over-sanding
Blending the finish so the repair sits naturally within the surrounding surface
Good veneer repair shouldn't draw attention to itself. A teak sideboard door, a dining table top, and a chair side panel can each demand a different approach depending on veneer thickness, age, and how the original finish was applied — which is why a one-size-fits-all repair method doesn't really exist.
Matching Grain and Colour: The Part Most DIY Repairs Miss
Even a structurally perfect repair will stand out if the colour or grain doesn't match — and this is where experience makes the biggest difference. Teak varies naturally: some pieces show straight, even grain, while others have more figure and movement. Age changes colour too, so freshly cut replacement veneer will almost always look lighter or more orange than 50-year-old timber until it's toned and finished to match.
Getting a repair to disappear means considering:
Grain direction and width
Colour depth and natural variation
Age-related oxidation
The existing finish type (oil, lacquer, varnish)
How the surrounding panel reads in different light
A patch that looks fine under workshop lighting can suddenly stand out next to a window. That's the kind of detail that separates a repair you can see from one you can't. For higher-value teak pieces, our teak and timber furniture refinishing service is built specifically around this level of colour and grain control.
Veneer Repair Near Me: What to Actually Look For
If you're searching "veneer repair near me," it's worth being selective. Basic furniture repair experience isn't the same as veneer experience, and mid-century pieces bring their own quirks — original finishes, thinner veneer cuts, and grain patterns that aren't always easy to source a match for.
Before booking anyone, ask them to explain:
Whether the veneer can realistically be saved, and why
Whether replacement is genuinely needed, or just easier for them
How they'll match grain and colour
What finish they'll use, and whether it suits the original
Whether the repair could affect the piece's value
How much of the original material will be preserved
Be cautious of anyone who suggests sanding the whole surface or replacing all the veneer before they've properly inspected it. That's sometimes the right call, but it should never be the automatic first answer.
How to Prevent Future Teak Veneer Damage
Once veneer has been repaired, a bit of care goes a long way — teak veneer can easily last decades when it's looked after. A few habits worth building in:
Keep furniture away from standing water and damp areas
Use coasters and placemats, always
Never place hot dishes, mugs, or lamps directly on the surface
Keep pieces out of direct, harsh sunlight
Avoid strong chemical cleaners — a soft cloth and mild cleaner is enough
Lift objects to move them rather than dragging them across the surface
Try to maintain stable indoor humidity where possible
Wipe up spills immediately and dry the surface fully
Moisture is the number one cause of future veneer failure. Even small amounts sitting near an edge or seam can slowly break down the adhesive bond and cause lifting months later. For everyday care, our guide on how to clean and care for indoor teak furniture without damaging it covers the specifics.
When to Call a Professional
Get advice before attempting your own repair if the veneer is lifting, bubbling, missing, stained, swollen, or already carries a previous failed repair — and especially before working on anything Danish, G Plan, Parker, Fler, Tessa, or otherwise collectible. It's also worth getting a second opinion if:
The piece may have collectible or resale value
The veneer feels especially thin or fragile
Damage sits near an edge or corner (higher risk of further breakage)
There's visible water damage
The furniture carries maker's marks or original labels
It's part of a matching set, where mismatched repairs are more noticeable
You're simply not sure whether it needs repair, refinishing, or nothing at all
If you're unsure which category your piece falls into, you can contact our Melbourne restoration workshop before attempting anything that could make the damage harder to fix.
Frequently Asked Questions
Can teak veneer repair be done successfully?
Yes, in most cases. Success depends on how much of the original veneer is intact and whether the base material underneath is still stable. Minor lifting, small chips, hairline cracks, and localised adhesive failure are usually repairable without replacing the whole surface. A proper assessment of veneer thickness, grain, colour, and substrate condition should always come before any repair decision.
Is veneer furniture actually worth repairing?
Almost always, yes — especially on genuine mid-century pieces. Because veneer is real timber rather than a printed laminate, it can be re-bonded, patched, and refinished in a way that vinyl or laminate surfaces simply can't. The exception is furniture where the core has swollen or rotted from long-term water damage; at that point, the cost of repair may outweigh the piece's value, and that's a conversation worth having honestly before work begins.
Can lifting teak veneer be fixed without replacing it?
Yes. Lifted veneer can usually be re-bonded with a suitable adhesive, even pressure, and careful clamping. The area needs to be cleaned first to remove trapped dust, old glue, or moisture damage. Acting early matters veneer left lifted for too long can dry out, become brittle, and eventually crack or break away entirely.
Is it safe to sand teak veneer at home?
Only very lightly, and only if you're certain of the veneer's thickness and condition. Because veneer is a fraction of the thickness of solid timber, aggressive or repeated sanding can quickly cut through it and expose the plywood or particleboard underneath at which point the repair becomes far more involved. In many cases, gentle cleaning or spot-level colour blending is a safer option than sanding.
What causes teak veneer to bubble in the first place?
Bubbling happens when the adhesive bond between the veneer and the base material fails, usually due to moisture, heat, humidity swings, ageing glue, or water getting in through a damaged finish. The affected area lifts and forms a visible blister. It's best addressed early repeated pressure or further heat exposure can cause a bubble to crack or detach completely.
How much does teak veneer repair cost in Melbourne?
Cost depends on the size and location of the damage, the veneer's condition, and how much colour and grain matching is needed. A small re-bonded lift is far less involved (and less expensive) than replacing a missing section on a valuable sideboard front. For a general sense of what furniture restoration involves cost-wise in Melbourne, our guide to the cost of furniture restoration in Melbourne breaks down the main pricing factors. The most accurate figure will always come from a photo-based quote of your specific piece.
How do I find a genuine veneer repair specialist near me?
Look for a restorer with demonstrated experience in teak veneer and mid-century furniture specifically not just general furniture repair. Ask to see before-and-after examples of veneer work, check whether they explain grain matching and finish blending clearly, and be wary of anyone who recommends full replacement before properly inspecting the piece.
Conclusion
Teak veneer repair is possible far more often than people expect but it depends entirely on the type of damage, how thin the veneer is, the condition of the base material, and how much original timber is left to work with. Lifting edges, small bubbles, minor chips, and general surface wear are usually straightforward to repair. Large missing sections, deep water damage, sanded-through patches, and a compromised substrate are more complex, and sometimes call for targeted replacement rather than a full re-veneer.
The one thing that consistently makes the difference between a successful repair and a bigger problem is patience. Teak veneer is real, valuable timber but it's thin, and the wrong cleaning product, adhesive, sanding technique, or finish can permanently affect both its appearance and its value.
At Mid Century Modern Restoration Man in Fitzroy, we assess every piece before recommending a repair path, and we aim to save as much original veneer as possible rather than replacing more than necessary. If your teak furniture has lifting, bubbling, chipped, or missing veneer, book a free consultation and we'll tell you honestly whether it can be saved — and what that repair actually involves.
Richard Lloyd is a Melbourne-based furniture restorer with over 30 years of experience restoring mid-century teak, Danish, and vintage timber furniture from his private workshop in Fitzroy.