
Danish and G Plan Teak Restoration: What's Actually Different
Danish and G Plan teak restoration differ in one thing that matters more than the timber: the finish that left the factory. Most Danish case pieces were oiled or given a thin lacquer. Most G Plan was sprayed with a hard lacquer.
That decides whether oil soaks in evenly or sits on top and goes blotchy. It also decides whether you can fix one scratch or have to take back the whole panel. Nearly everything else follows from it.
The factory finish decides the rest of the job
Danish workshops through the 1950s and 60s generally finished teak with oil, wax or a thin coating that sat close to the grain. G Plan, made by E. Gomme in High Wycombe, sprayed its teak ranges with a hard film: cellulose early on, pre-catalysed lacquer later.
Both were sensible at the time. They age nothing alike. An oiled surface wears down gradually and evenly. A film finish chips, and once it chips the bare patch drinks in whatever you apply while the surrounding lacquer takes none of it.
I test before touching anything. Acetone on a cotton bud, on a hidden edge under the top: if the finish goes soft and tacky, it's lacquer. Methylated spirits softening it instead means shellac. If neither does much and a little mineral turps darkens the timber slightly, it's oil.
That two-minute test decides which of the next two sections applies.
What Danish teak needs
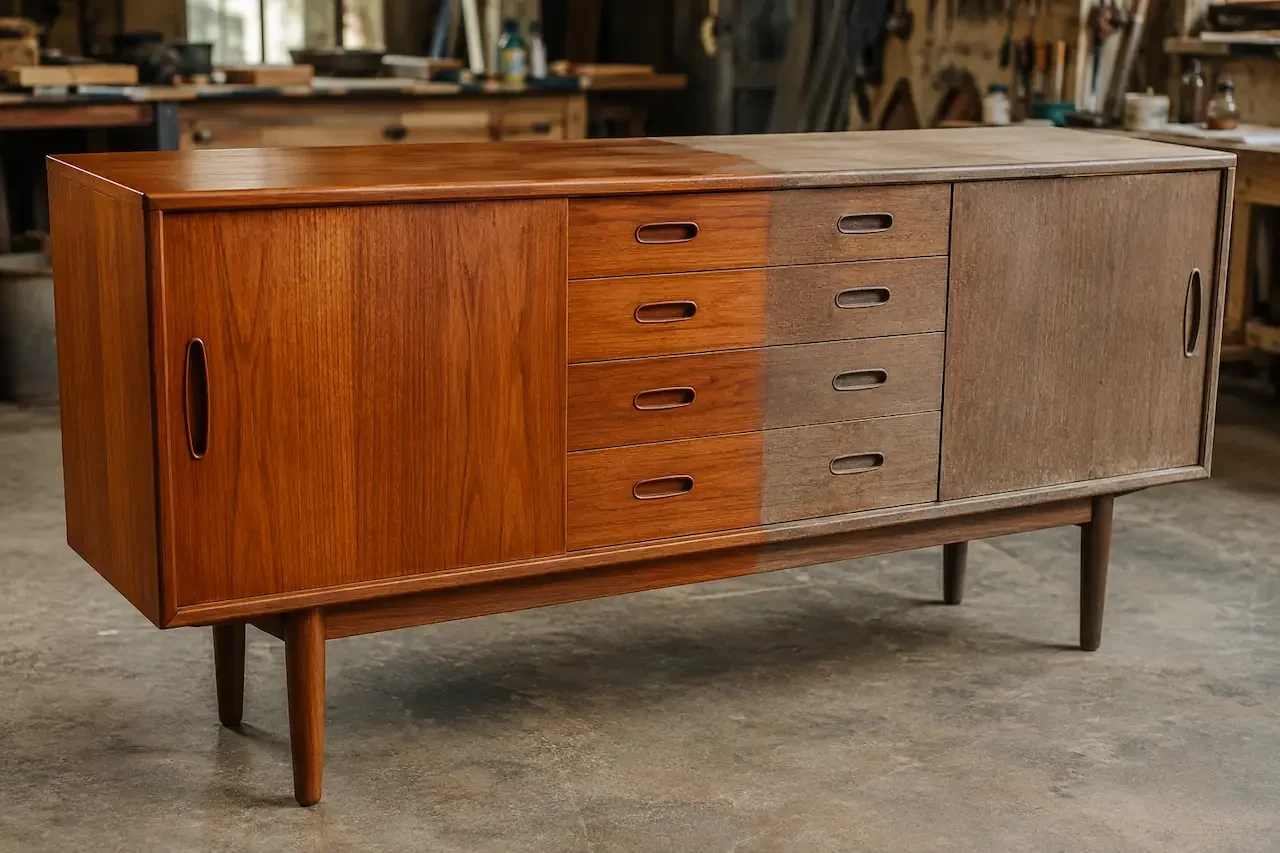
Restraint, usually. Danish case furniture tends to use thin teak veneer over a core, with solid teak kept for edges, legs and chair frames. The design carries itself through proportion and edge profile, so anything that softens an edge takes away the thing people bought it for.
An oiled Danish sideboard that's gone dry and pale usually hasn't been damaged. It's oxidised across the top few cells of timber and stripped of oil by dry indoor air. Cleaning it and feeding it with a wiping oil brings the colour back without removing material.
The pieces that give me trouble are the ones already sanded. Once someone has been over a Danish top with an orbital sander the crisp edge is gone, and no finish puts it back.
G Plan is a different problem.
What G Plan teak needs
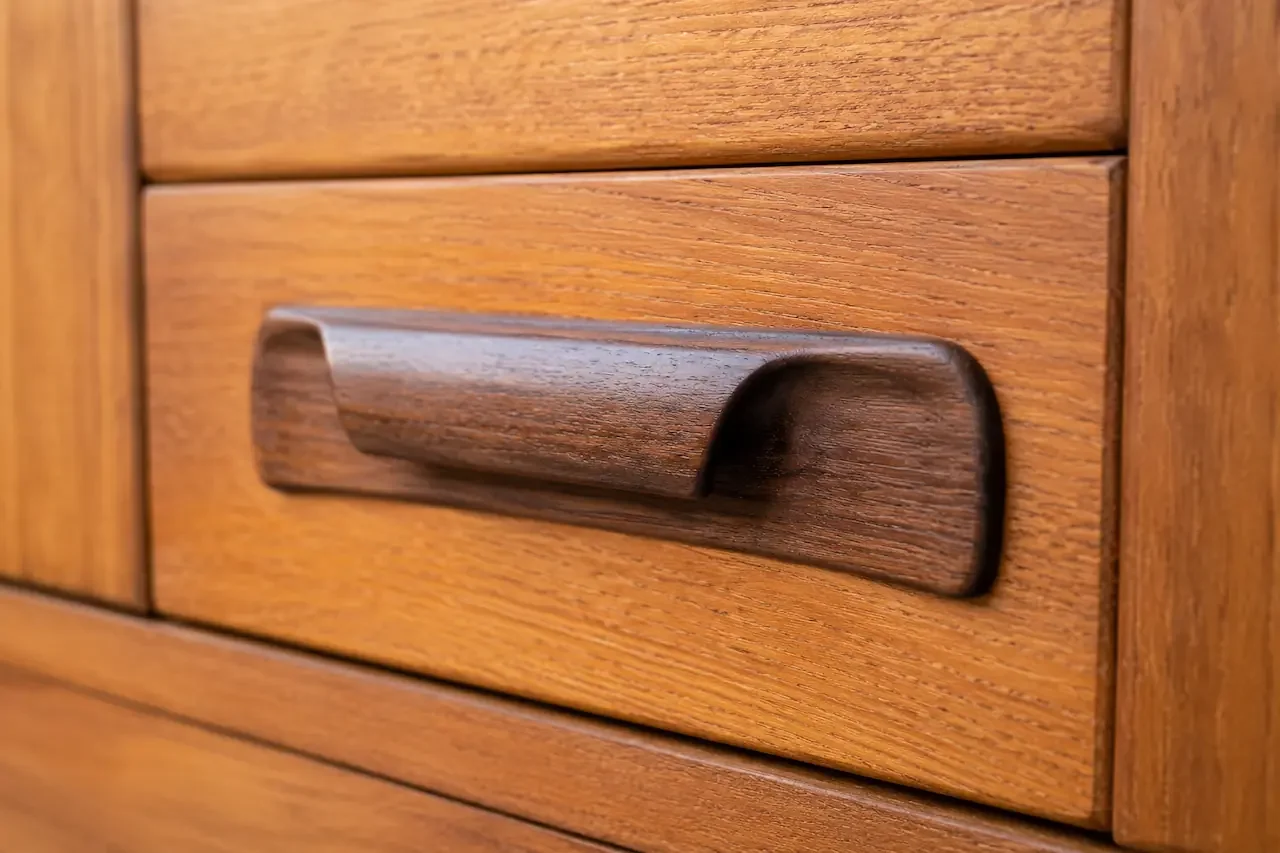
G Plan was built for daily use and it usually shows. The frames are heavier than Danish equivalents and survive well. What wears out is the surface and the moving parts: drawer runners, door catches, and the lacquer on table tops and drawer fronts.
The Fresco range, designed by Victor Wilkins in the mid-1960s, is the one I see most in Melbourne. It's teak with afrormosia handles and trim, and that combination catches people out. Afrormosia is denser and takes stain far darker than teak. Stain a whole Fresco sideboard to even out the colour and you get a mid-brown case with handles that have gone almost black.
Look for the label before any work starts. G Plan used a rectangular sticker, often inside a drawer or on the back panel, and earlier pieces carry the E. Gomme name instead. Those labels come off easily during cleaning, and my guide to mid-century makers' marks covers where to find them.
The lacquer is where most G Plan restorations go wrong.
Why the sanded patch went darker than the rest
This is the most common question I get about G Plan. Someone sands a scratch or a ring out of a lacquered top, applies Danish oil to blend it back, and the sanded area comes up two or three shades darker than everything around it.
Nothing was done wrong to the timber. The oil went into bare wood where you sanded and sat on unbroken lacquer everywhere else. More oil makes it worse, because the lacquered area still can't absorb any.
The fix is to take the whole panel back to bare timber and finish it in one go. Spot repairs work on oiled Danish furniture. They rarely work on a lacquered G Plan surface. That work sits under my teak and timber refinishing service.
Check the veneer before anything else
Teak veneer on 1960s case furniture is commonly around 0.6mm, and some late-60s and 70s production runs thinner again. An orbital sander at 120 grit goes through that in under a minute on an edge.
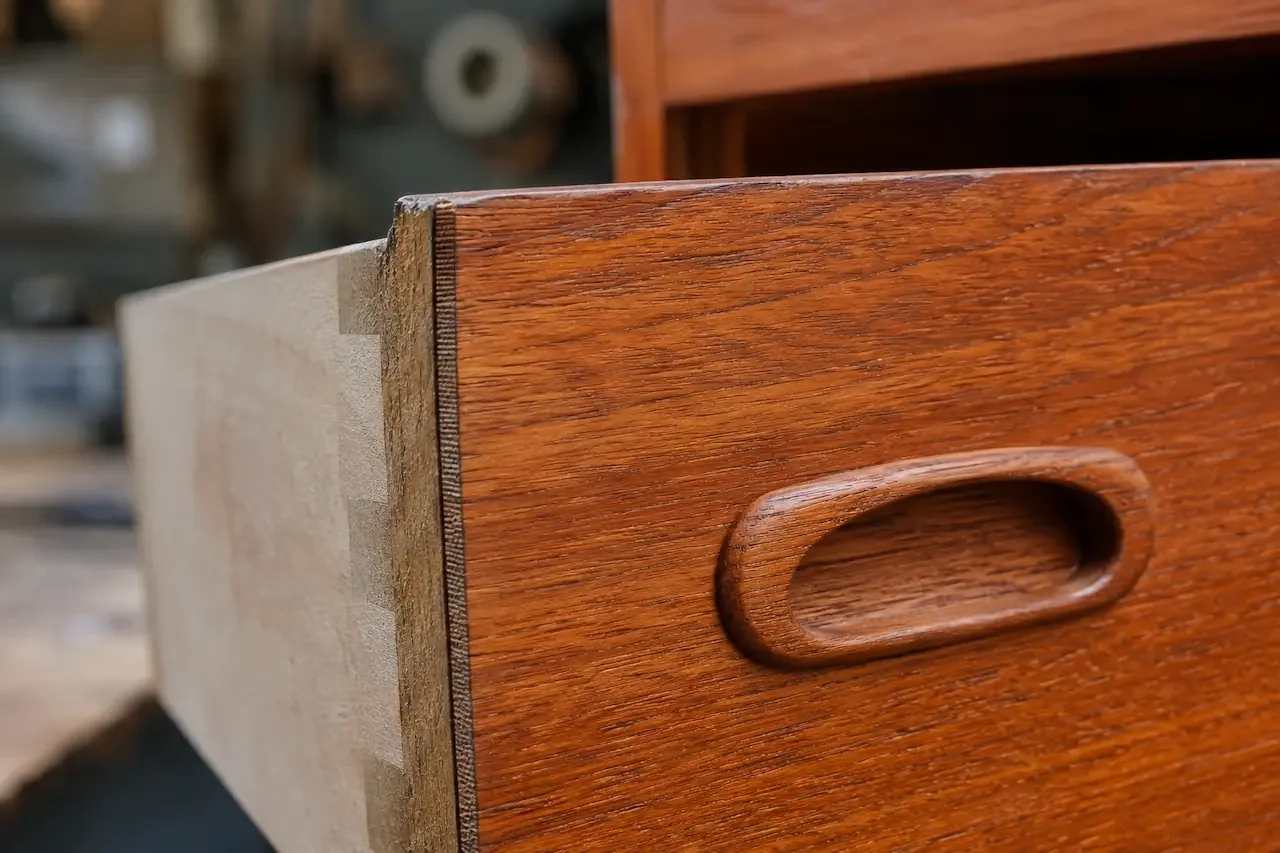
You can check yours without tools. Look at the back edge of a door or the top edge of a drawer front, where the veneer meets the core, and you'll see the line. Corners go first, because that's where sanding pressure concentrates.
Once veneer is cut through, nothing brings it back. The core underneath takes colour differently and will always show. From there the options are patching in matching veneer or living with it, and I cover both in my guide to teak veneer repair.
Surfaces are only half of it. Most pieces that come to me need work underneath first.
Structure comes before surface
A refinished top on a loose carcass wastes the finish. Knocking a frame apart to re-glue joints marks the surface you just spent a week on, so the order matters: joints, runners and door alignment first, then the finish.
On G Plan dining chairs the usual culprits are the joints where the side rails meet the back legs. On sideboards it's the timber drawer runners, which wear a groove and then bind. Both get worse quickly once movement starts. There's more on my furniture repair and structural restoration page.
Most full restorations in my workshop run two to four weeks. Structural work or veneer patching takes longer, and I'll tell you which before I start. My guide to furniture restoration costs in Melbourne sets out what moves the price.
Conclusion
The difference between these two isn't the teak. It's the finish, and it changes how the job should be approached. Danish teak usually wants less work than people expect. G Plan usually wants the whole surface rather than a patch. The aim isn't to make it look new. It's to make it look right.
Why work with me
I'm Richard Lloyd, and I've been restoring furniture for over thirty years from my workshop at 230 Brunswick St in Fitzroy. Every piece is assessed and worked on by me.
I identify the original finish before planning the job, not after
I repair joints rather than replace components wherever the timber allows
I use traditional oils and waxes that sit in the grain rather than film finishes over the top
If a piece isn't worth restoring, I'll tell you before you've paid me anything
Bring it in, or send photos first. Book an appointment; the workshop is by appointment only, and I service Northcote, Greater Melbourne and the Mornington Peninsula.
Frequently asked questions
I sanded a scratch out of my G Plan table and oiled it. Why is that patch darker?
The oil soaked into bare timber where you sanded and sat on the lacquer everywhere else. It's a finish problem rather than damage to the wood, and more oil won't blend it. The whole top has to come back to bare timber and be finished in one go.
Is G Plan teak solid or veneer?
Both, usually in the same piece. Tops, door fronts and side panels are generally veneer over a core, while legs, edges, rails and handles are solid. Check a door's back edge for the veneer line before you sand.
Can Danish teak furniture be sanded?
Solid components can be, carefully and by hand. Veneered panels usually shouldn't be: at roughly 0.6mm there's very little to lose, and edges go through first. If the surface is dull rather than damaged, cleaning and oiling fixes it without removing material.
Should I use teak oil or Danish oil on a G Plan sideboard?
Neither, if the original lacquer is intact, because the oil has nowhere to go and will stay tacky. Test a hidden edge with acetone first. If it's lacquered, clean it and leave it. On bare or oiled timber, a wiping oil applied thinly and wiped back within fifteen minutes is safer.
Does restoring a Danish teak sideboard reduce its value?
Sympathetic work doesn't. Structural repair, cleaning and re-oiling generally hold or improve value. What reduces it is sanded-through veneer, dark stain over teak, replaced handles and a modern gloss finish. Removing the maker's label costs more than people realise.